
Getting a CSV file into Google Sheets should be a simple, two-click job. But if you’ve ever tried it with a large or slightly unusual file, you know the reality is often a frozen browser, garbled data, and a whole lot of frustration.
Let's get real about what goes wrong and move past the "just click import" advice.
Why Importing CSV Files Into Google Sheets Is Often a Struggle
 The native import tools in Google Sheets just weren't built for the kind of data we work with today. You can have a perfectly clean CSV, but the second you try to upload it, your browser chokes and grinds to a halt.
This isn't your fault. It's a fundamental problem with trying to process huge files entirely within a web browser. Your local computer's memory is forced to do all the heavy lifting, and for large datasets, it’s an impossible task.
I’ve seen it countless times—a marketing analyst has a massive campaign performance report, and all they get is Google’s infamous 'Page Unresponsive' pop-up. That's the core issue in a nutshell.
The Technical Roadblocks You Constantly Face
Browser crashes are just the beginning. A whole host of other technical gremlins can sneak in and scramble your data before it ever makes it into a cell. Instead of analyzing insights, you end up spending hours just trying to clean up the mess.
Here are some of the most common headaches I've run into:
- Tricky Delimiters: Sure, "CSV" stands for comma-separated, but plenty of systems spit out files using semicolons or tabs instead. If Google Sheets guesses wrong on the import, your beautifully structured data gets crammed into a single, useless column.
- Character Encoding Errors: Ever open a file and see strange symbols like
’where an apostrophe should be? That’s a classic character encoding mismatch. It’s what happens when data created on one type of system is opened on another, turning clean text into gibberish. - Strict Cell and Size Limits: Google Sheets has hard limits, and knowing them is the first step to working around them. You can get a deep dive into the official constraints by checking out the Google Sheets file size limit.
The hard truth is that Google Sheets maxes out at 5 million cells per workbook. This isn't a new problem; it's a long-standing ceiling that forces anyone with serious data to manually chop up their files just to get them imported.
This became painfully obvious when remote work took off. Google Sheets usage shot up by over 200% in a single quarter as teams everywhere tried to pull in huge CSVs from their CRMs and sales databases.
But even with that massive surge in demand, the core limitations didn't change. A Forrester study on BI tools even found that importing a file with just 500,000 rows is often enough to crash a browser, costing users an average of 4.2 hours per failed attempt.
3 Ways to Natively Import a CSV into Google Sheets
Before you start exploring complex scripts or third-party tools, it's worth getting to know the native import options Google Sheets offers. For most day-to-day tasks involving reasonably sized and well-formatted CSVs, these built-in methods are all you need.
I always recommend starting here. Mastering these tools first helps you understand why you might need something more powerful later on. Each has its place, and knowing the difference will save you from headaches like accidentally wiping out your work or creating a messy, unusable sheet.
Method 1: The Classic File Import Wizard
This is the go-to method for most people, and for good reason. Using the File > Import menu gives you the most control over exactly how your data lands in the spreadsheet. It’s perfect for one-off uploads where you need to be precise.
When you upload your CSV, Google will pop up a little import wizard with a few critical choices. Getting these right is the key to a clean import.
Let's walk through what each "Import location" option actually does:
- Replace spreadsheet: Be careful with this one. It’s the nuclear option—it deletes everything in your current Google Sheet (all tabs, all data) and replaces it with the contents of your CSV. Only use this when you're starting a brand-new project from scratch.
- Insert new sheet(s): This is my most frequently used option. It’s safe, clean, and predictable. It leaves all your existing work untouched and just adds your CSV data in a brand-new tab within the same workbook. Perfect for bringing in a new dataset to analyze alongside your other information.
- Append rows to current sheet: This is your best friend when you’re adding new data to an existing list. Think of weekly sales reports—you can use this to tack the new week's numbers right onto the bottom of the previous weeks' data. It neatly stacks the new rows under your current data.
A Pro Tip From Experience: The import wizard’s "Separator type" setting is a lifesaver. While "Detect automatically" works probably 80% of the time, I’ve seen countless files from European systems or specialized software that use semicolons (
;) instead of commas. If your data preview looks like a jumbled mess all crammed into the first column, manually changing the separator will almost always fix it instantly.
Method 2: The Quick-and-Dirty Google Drive Method
If you just need to get a CSV into a sheet as fast as possible without any fuss, this is the way to do it. You can skip the import wizard entirely by working directly from your Google Drive.
Just drag and drop your CSV file into any folder in your Drive. Once it’s uploaded, right-click the file and choose Open with > Google Sheets.
That’s it. Google automatically converts the CSV into a brand-new, standalone Google Sheet, leaving your original CSV file untouched. It’s incredibly fast, but the trade-off is control. You get zero options for choosing a delimiter or deciding where the data goes—it always creates a new file. This is my go-to when I just need to quickly view or do some light work on a CSV without mixing it into an existing project.
Method 3: Using the IMPORTDATA Function for Live Data
Now for something a bit more dynamic. The IMPORTDATA function is a game-changer when you're working with data from a URL that gets updated regularly. Instead of downloading and re-uploading a file over and over, you can just point a cell to a public CSV link.
The formula couldn't be simpler: =IMPORTDATA("URL")
For example, I once worked on a project tracking public health data from a government site that published a daily CSV report. Using =IMPORTDATA("http://data.source.gov/report.csv") in a cell automatically pulled that day's data right into the sheet.
But before you get too excited, you need to know about its limitations. This is where people often get stuck.
- The URL must be public. If it requires a login, it won't work.
- It's not truly real-time. The data only refreshes every hour or two, so it’s not for situations needing up-to-the-minute information.
- It can easily fail on larger files. There are unpublished size limits, and if the file is too big or the source is slow, it will time out.
IMPORTDATA is brilliant for connecting to live, public datasets, but its refresh lag and lack of robust error handling make it a poor choice for anything mission-critical. For those scenarios, we’ll need to look at more reliable solutions.
Choosing the Right Native Google Sheets Import Method
Deciding which built-in tool to use comes down to what you're trying to accomplish. Are you adding to an existing report, or just quickly viewing a new file? This table breaks it down to help you pick the right method for the job.
| Method | Best For | Key Limitation | Level of Control |
|---|---|---|---|
| File > Import Wizard | One-off uploads, files needing specific delimiter settings, adding to existing sheets. | Requires manual steps for each import. | High |
| Open with Drive | Quickly converting a CSV into a new, standalone Google Sheet with no extra steps. | No control over import location or settings; always creates a new file. | None |
| IMPORTDATA Function | Connecting to a small, public CSV on a URL that updates periodically. | Unreliable for large files; refresh is not real-time. | Low |
Ultimately, for most standard CSVs you encounter, the File > Import wizard is your most reliable and flexible choice. But for speed or dynamic data, the other two are fantastic tools to have in your back pocket.
How to Fix Common CSV Import Errors
It's a familiar story: you go to import a CSV, and everything goes sideways. A failed import isn't just an error message; it's a dead end for your analysis. Let's walk through the most common gremlins that pop up when you import a CSV into Google Sheets and how to fix them on the fly.
These problems are more than just a minor annoyance. A recent survey found that a staggering 91% of small businesses using Google Workspace depend on CSV exports from their banks for bookkeeping. The catch? Date conversion errors botch 65% of those imports, costing bookkeepers an average of 2.1 hours per file in manual cleanup. You can see the full findings on financial data imports here to understand just how widespread these issues are.
Solving Incorrect Data Formatting
Picture this: you're an accountant importing a bank statement. You open the CSV, and all the transaction dates are formatted as 'YYYY/MM/DD'. When you pull this into Google Sheets, it might see those dates as nothing more than plain text. Suddenly, you can't sort by date, run calculations, or use any of your time-based formulas.
The best place to fix this is during the import process itself. When you use the File > Import wizard, you'll see a preview of your data. This is your chance to intervene. Click the header of the column giving you trouble—in this case, the dates—and manually change its data type from 'Automatic' to the specific format you need. This one move tells Google Sheets exactly how to read the data.
Already imported the file and now it's a mess? No sweat. Just use a helper column with the DATEVALUE function. If your text-based date is in cell A2, you'd simply type =DATEVALUE(A2) into B2. This converts the text into a real date serial number that you can format and use in any formula.
Key Takeaway: Pay attention to that data preview window during import. Proactively telling Google Sheets what kind of data is in each column—text, number, or a specific date format—can prevent 90% of common formatting errors before they even start.
Taming Delimiter Chaos
Have you ever imported a CSV only to find all your data—names, dates, amounts, everything—squished into a single column? That's a classic case of what I call "delimiter chaos." It happens when your file uses a separator other than a comma, like a semicolon (;) or a tab, and Google Sheets misses the memo.
This is especially common with files generated by European software or older enterprise systems. Instead of splitting your data neatly into columns, Sheets just reads each row as one long, jumbled string of text.
Thankfully, the fix is built right into the import wizard.
- Start by navigating to File > Import and uploading your CSV.
- When the settings window pops up, find the Separator type section.
- Instead of 'Detect automatically,' choose Custom.
- A small input box will appear. Just type in the character your file is actually using, like a semicolon
;.
You'll see the data preview instantly rearrange itself into perfect columns. It’s a simple change that can turn an unusable mess into a perfectly structured dataset.
Fixing Character Encoding Mismatches
Another classic sign of trouble is seeing bizarre symbols like ’ or “ where apostrophes and quotation marks should be. This is a tell-tale sign of a character encoding problem. It happens when the CSV was saved with one encoding standard (like ANSI) and Google Sheets tries to read it using another (like UTF-8).
UTF-8 is the universal standard for a reason—it supports a huge range of characters, from emojis to symbols in other languages. If your file isn't saved as UTF-8, any characters outside the basic set can get garbled in translation.
The most reliable solution is to fix the file before you import it. Open the CSV in a basic text editor like Notepad (Windows) or TextEdit (Mac). Go to 'Save As,' and you'll see an option for encoding. Manually select UTF-8, save the new version, and upload that one instead. All your characters will now show up exactly as they should.
Handling Large CSV Files Without Crashing Your Browser
If you've ever worked with large datasets, you know the feeling. You try to import a big CSV file, and suddenly your entire browser locks up. The dreaded “Page Unresponsive” error pops up, your laptop fans start screaming, and you’re forced to kill the tab. It's frustrating, and it’s not a random bug—it’s a core limitation of how web browsers are built.
When you use the standard File > Import option, your computer’s memory (RAM) has to process every single row of that CSV. For a small file, it's no problem. But when you're dealing with hundreds of thousands or even millions of rows, you’re asking your browser to do a job it was never designed for. It eats up all available memory and brings everything to a grinding halt.
The solution is to flip the entire process on its head. Instead of forcing your own machine to do all the heavy lifting, you offload the work to a powerful server.
The Power of Server-Side Processing
Think of it like this: trying to build a car in your living room is a bad idea. You don't have the space or the right equipment. Server-side processing is like moving that project to a dedicated factory designed for exactly that task.
Tools like SmoothSheet are built on this principle. They bypass your browser’s limitations entirely by handling the import on their own high-performance servers. You start the upload from your browser, but the real work happens in the background on a machine that's optimized for crunching data.
The workflow becomes incredibly simple and stress-free:
- Drag and drop your massive CSV file into the tool.
- The file gets securely uploaded to the server.
- The server parses all the data, maps it, and streams it directly into your Google Sheet.
- You get a notification when it's done, and your computer never even breaks a sweat.
This approach means you can import a file with 2 million sales records from your e-commerce platform and just keep working on other things. Your browser stays snappy, and the import finishes reliably every time.
This flowchart is a great reference for what to do when an import first goes wrong, helping you diagnose the problem and find the right fix.
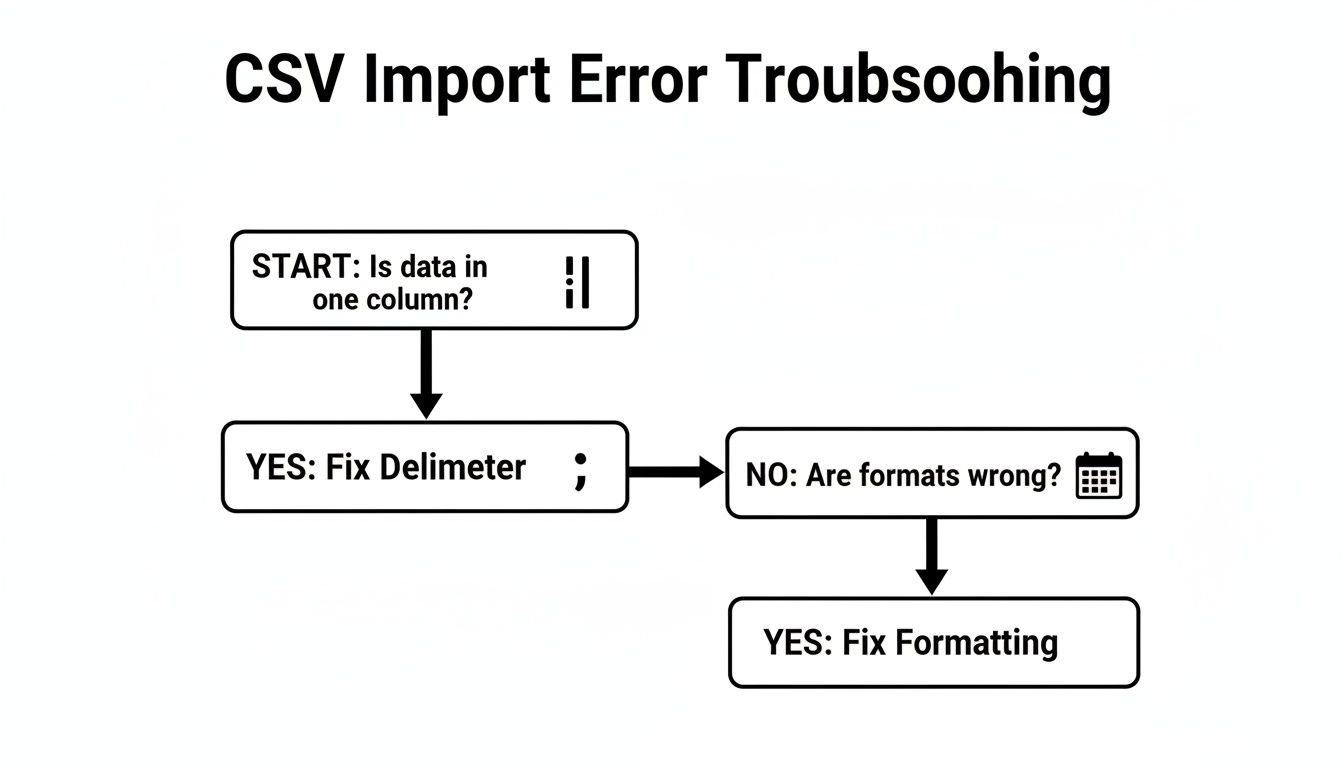
As the decision tree shows, the first step is always to figure out what you're seeing—is it a column issue or a formatting mess?—before you try to fix it.
Game-Changing Benefits of Offloading Imports
Beyond just avoiding browser crashes, using a dedicated tool for large CSV imports comes with some serious perks that save time and protect your data.
A huge one is data safety. A good tool will automatically take a snapshot of your sheet before the import starts. If something goes wrong—you mapped a column incorrectly or the data was wrong—you can roll back to the previous version with a single click. No more fear of accidentally corrupting hours of work.
Another massive time-saver is smart column mapping. The tool can automatically detect headers in your CSV and match them to the right columns in your Google Sheet, even if they're in a different order. This is way better than manually dragging columns around just to make a simple "Append" import work.
But the real magic for anyone doing ongoing analysis is formula preservation. Imagine you have a dashboard full of complex
SUMIForVLOOKUPformulas. A server-side importer can add new rows of data and automatically apply your existing formulas to them. Your dashboard stays up-to-date without you having to do a thing.
When to Make the Switch to a Dedicated Tool
The built-in methods are fine for smaller, clean files. But you should seriously consider a server-side solution if you find yourself in these situations:
- Your files are regularly over 100,000 rows. This is usually the point where browser performance starts to take a nosedive.
- You've seen the "Page Unresponsive" error even once. That’s a clear sign your workflow is too much for your browser to handle.
- You spend more than 15 minutes splitting files by hand. Your time is too valuable to be wasted on tedious tasks that can be automated.
- You need to preserve complex formulas. Native imports will often break your formulas or force you to manually drag them down to new rows.
- You need a reliable way to append new data. If you're constantly adding fresh data to a master sheet, a tool that manages this seamlessly is a must.
For anyone tired of hitting Google's limits, learning how to upload large CSVs to Google Sheets without browser crashes is the logical next step. It's about shifting from fighting with your tools to letting them work for you, so you can finally import your data with the speed and reliability it deserves.
Automating CSV Imports with Google Apps Script

When you find yourself importing the same file over and over, it’s time to stop doing it by hand. This is where Google Apps Script comes in—it’s a surprisingly powerful way to automate repetitive tasks right inside your spreadsheet.
Think of it as teaching your spreadsheet to fetch and import data all on its own. It's perfect for situations like updating a project dashboard every morning with a fresh data export from another tool. You’ll have to get your hands dirty with a little bit of code, but the time you save on recurring imports is almost always worth the initial effort.
A Practical Script for Automated Imports
Let’s imagine you're a project manager. Every day at 8 AM, a system drops a file named daily_tasks.csv into a specific Google Drive folder. Instead of manually importing it each morning, you can write a script that grabs it automatically.
Here’s a complete, well-commented script that does exactly that. To get started, just open your Google Sheet, head to Extensions > Apps Script, and paste this code into the editor.
// This function finds a CSV in Google Drive and imports its data. function importCsvFromDrive() { // 1. Define your target spreadsheet and the CSV filename. const sheet = SpreadsheetApp.getActiveSpreadsheet().getSheetByName("Dashboard"); const fileName = "daily_tasks.csv";
// 2. Find the CSV file in your Google Drive by its name. const files = DriveApp.getFilesByName(fileName);
// 3. Check if the file actually exists before proceeding. if (files.hasNext()) { const file = files.next(); const csvData = file.getBlob().getDataAsString();
// 4. Parse the CSV content into a 2D array.
const parsedData = Utilities.parseCsv(csvData);

// 5. Clear the old data and write the new data to the sheet.
sheet.clearContents();
sheet.getRange(1, 1, parsedData.length, parsedData[0].length).setValues(parsedData);
} else { // Log an error if the file isn't found. Logger.log("File not found: " + fileName); } }
This script leans on two core Apps Script services. First, DriveApp.getFilesByName() acts like a search bar, scanning your Google Drive for the file you named. Once found, Utilities.parseCsv() does the heavy lifting, turning the raw text from the CSV into a clean grid of data that Google Sheets can immediately understand.
Knowing the Limitations
While Apps Script is powerful, it’s not a silver bullet. Google puts some strict limits in place to keep everything running smoothly for everyone.
The big one to watch out for is the script execution time limit. A single script run can't go longer than 6 minutes for personal Google accounts or 30 minutes for Google Workspace accounts. If you’re dealing with a massive or complex CSV, your script could easily time out, leaving you with a half-finished import.
This isn't just a theoretical problem. In the BI world, a Rows.com study of 2,500 analysts revealed that only 28% could reliably automate their data refreshes using built-in functions because of these kinds of quota timeouts. This roadblock makes creating real-time dashboards for sales or operations teams a serious challenge.
You also have to keep API quotas in mind, which are the daily caps on how many times your script can "call" services like DriveApp or SpreadsheetApp. For most people, these limits are pretty generous, but they can become an issue if you’re running automations very frequently.
All this makes Apps Script a fantastic choice for moderately sized, scheduled tasks. But for importing huge, multi-million-row files on a tight deadline, it can be an unreliable partner. If you want the power of automation without the coding headache, it’s worth checking out some of the best CSV importers for Google Sheets designed to handle these exact challenges.
Common CSV Import Questions (and Quick Answers)
Let's tackle some of the common questions and head-scratchers that pop up when you're trying to get CSV data into Google Sheets. These are the things people ask me about all the time, so I'll give you the straight answers.
What’s the Real CSV File Size Limit for Google Sheets?
Officially, Google doesn't list a maximum file size in megabytes. The hard limit is the total number of cells in a spreadsheet: 5 million cells.
But here’s the real-world answer: your browser will crash long before you hit that 5 million cell limit. Trying to import a massive CSV file directly through the browser is a recipe for the dreaded "Page Unresponsive" error. This is because your computer's memory just can't handle it. For anything more than a few hundred thousand rows, you'll save yourself a massive headache by using a server-side tool.
How Can I Get Data From a CSV to Update Automatically?
Setting up an automatic data refresh is totally possible, but the "how" depends entirely on where your CSV file is stored.
Here’s a breakdown of the usual suspects:
- Public CSV on the web: The
=IMPORTDATA("URL")function is your best friend here. It's simple and automatically refreshes about every hour. Just drop the function in a cell, and you're good to go. - File sitting in Google Drive: This requires a bit of code. You'll need to write a simple Google Apps Script and set up a time-based trigger that tells it to run on a schedule (say, every morning at 8 AM) to grab the latest version of the file.
- Files from private sources or complex setups: For these scenarios, a dedicated connector tool like SmoothSheet is the most robust option. It lets you build reliable, recurring import schedules without you having to fuss with scripts, timeouts, or API limits.
A Quick Tip: Keep in mind that
=IMPORTDATAisn't instantaneous. The one-to-two-hour delay means it’s not the right tool for dashboards that need to show live, up-to-the-minute data.
Can I Import a CSV Without Wiping Out My Existing Data?
Yes, absolutely. You don't have to worry about accidentally overwriting your hard work.
When you go through the File > Import menu, you'll see a dialog box with an "Import location" dropdown. This is where you call the shots. To keep your current data safe, just choose one of these options:
- Append to current sheet: This just tacks on all the new rows from your CSV to the very bottom of the sheet you're currently viewing. Easy.
- Insert new sheet(s): This is the safest bet. It creates a brand-new tab in your workbook for the imported data, leaving your other sheets completely untouched.
Why Are My Numbers Being Treated as Text?
Ah, the classic formatting problem. This almost always happens because your numbers are "dirty." Google Sheets might see characters it doesn't recognize as numerical, like currency symbols ($, €), commas (1,000), or even pesky hidden spaces before or after the number.
When Sheets is unsure, it plays it safe and formats the whole column as plain text. The quick fix is often during the import process itself—in the preview window, make sure the column is set to 'Automatic'. The best fix, though, is to clean up those extra characters in the source CSV file before you even start the import.
Tired of your browser freezing on large file uploads? SmoothSheet handles massive CSV and Excel files on secure servers, so your computer never slows down. Get fast, reliable imports every time without hitting Google's limits. Try SmoothSheet for free today.